
Getting started with containerizing ReactJs application — development and production environment setup.


Overview
Before the wide adoption of containerization and docker developers develop their web apps and everything works perfectly in development machine but when they push it to the production environment it doesn’t work. This was because the development environment and production environment are not the same and that causes problems. There is also another issue if there is an error or a bug in the production environment it is very difficult to figure out what is wrong and solve that issue since that issue might not be in your local setup.
This is where containerization technologies like docker come in. Docker solves the above issues by packaging your web app with all your dependencies and shipping it to production. This container is self-sufficient and can be run anywhere, The environment running the container doesn’t care what is in the container (It just works). When you use Docker for development and production you will not run into unforeseen production issues or bugs since you are using the same container you have been running locally in production.
Getting Started
In this article, we are going to go over docker development and production docker setup for ReactJs applications. We will build a basic ReactJs application and containerize the app both for development and production. We will use Nginx for serving production build of our ReactJs application.
Nginx is open-source software and a web server for reverse proxying caching and load balancing. Nginx also provides HTTP server capabilities. And it is mainly designed for maximum performance and stability. Nginx provides functions like IMAP, POP3, and SMTP as a proxy server for email.
If you want to clone the app and try it locally use the following git command. and check out the reactjs-docker-setup branch.
git clone [https://github.com/endalk200/blog-repository.git](https://github.com/endalk200/blog-repository.git)
cd ./blog-repository
git checkout reactjs-docker-setup
We have two environments that our web app runs in. The first one is the development environment where we want hot reloading when making code changes. The other environment is the production environment. In production, our ReactJs app is optimized and built to static assets and served through a web server or a CDN. In our case, we are going to use Nginx to serve our static assets.
We are going to make sure both our production and development docker configurations are as close to each other as possible to avoid unforeseen issues once deployed.
When we build our react application the output is optimized static assets (html, css and js file). To serve these files we are going to use Nginx, Popular web server and reverse proxy server.
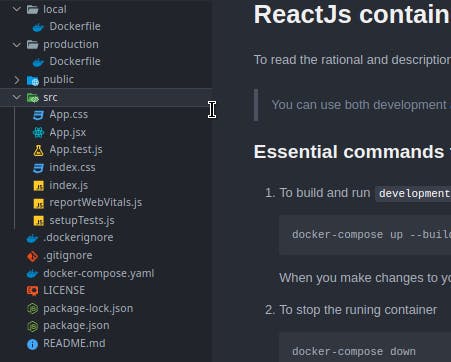
Our file structure looks like this
 File structure
The most important files we need to see are Dockerfile both in local and production directory anddocker-compose.yaml file. Let’s break it down depending on the environment.
Development
Since in development we want hot realoading we are going to mount our local directory to our container. We will achieve this using docker-compose.yaml file. Let’s start with our dockerfile.
FROM node:alpine AS dependencies
We are going to use alpine as a base image. It is a minimal Linux build with necessary packages. We are going to use a multi-stage build and we will name this stage dependencies where we install all OS level and application dependencies.
RUN apk add --no-cache libc6-compat
libc6-compat is needed in nodeJs build systems. If you want to now more about this refer here
WORKDIR /app
We are going to set our working directory to /app
COPY package.json package-lock.json ./
Then we are going to copy our package.json and package-lock.json files to install our app dependencies.
RUN npm ci
This command is similar to [npm install](docs.npmjs.com/cli/v7/commands/npm-install), except it's meant to be used in automated environments such as test platforms, continuous integration, and deployment -- or any situation where you want to make sure you're doing a clean install of your dependencies.
In short, the main differences between using npm install and npm ci are:
The project must have an existing
package-lock.jsonornpm-shrinkwrap.json.If dependencies in the package-lock do not match those in
package.json,npm ciwill exit with an error, instead of updating the package-lock.npm cican only install entire projects at a time: individual dependencies cannot be added with this command.If a
node_modulesis already present, it will be automatically removed beforenpm cibegins its install.It will never write to
package.jsonor any of the package-locks: installs are essentially frozen.
Unto the second stage which is the runner stage, where we run our application.
FROM node:alpine AS runner

WORKDIR /app

COPY . .

COPY --from=dependencies /app/node_modules ./node_modules
In the above config, we are setting the working directory where we run our application to /app. Then we are copying all files in our local directory to the container. NOTE: All files in.dockerignore file will not be added to the container.
ENTRYPOINT ["npm", "run", "start"]
The last one will be our ENTRYPOINT . This is where the command to run the application goes. npm run start will run our web app locally.
Now that we have seen our Dockerfile we are going to see out docker-compose.yaml file.
version: '3'

services:
    web:
        build:
            context: .
            dockerfile: ./local/Dockerfile
    image: reactapp_image
    container_name: reactapp_container
    ports:
        - 3000:3000
    volumes:
        - ./:/app
Let’s break this down. basically, we are telling Docker to use the current directory as a context where to run everything and use the Dockerfile found in the local directory. Then we are telling docker to name the image built reactapp_image and the container reactapp_container We are also telling docker to map our local machines port 3000 to the containers port3000 . Then since we want all code changes we make locally to be reflected in our dev server we are going to map our current directory to the containers /app directory where our application runs in.
To run our development server for the first time we have to build our image and spin it up. To do that we will execute the following command.
docker-compose up --build
After that first time, you just have to run docker-compose up to spin up the container.
To tear down the running container use the command.
docker-compose down
For some reason, if you have to run some kind of command inside the container, first run docker ps to list all running containers with their container ID. Then use the ID and run the following command.
docker exec -ti f6d6a1d9a076 bash
Assuming f6d6a1d9a076 is your container ID it will open up an interactive bash session where you can run your commands right in the container.
Production
Now that we have seen our development docker config let’s see the production one. The production docker config only needs the Dockerfile to run.
The first stage of our Dockerfile is the same as the above config. Let's start with the build stage.
FROM node:alpine AS builder

WORKDIR /app

COPY . .

COPY --from=dependencies /app/node_modules ./node_modules

RUN npm run build && npm install --production --ignore-scripts --prefer-offline
In this stage, we are choosing alpine as build stage base image. We are also setting the working directory to /app then we are copying all files in the current directory to the /app directory. After that, we are copying all dependencies downloaded and stored in the /app/node_modules directory to node_modules directory from the previous dependencies stage.
After that, we are running npm run build after npm install --production --ignore-scripts --prefer-offlineThis will build an optimized build of our ReactJs application.
The next stage is where we run our web server using Nginx This is where things get interesting. We are going to use the default Nginx config since we don’t need anything other than that to run our app.
Nginx has some default configs and behaviors we need to know. Before getting into our docker config let’s see a few of them.
Nginx serves static assets found in /usr/share/nginx/html directory. So all static assets like HTML, CSS, and Js need to be in this directory in order forNginx to serve them (We can also change this behavior by editing the default config file). By default Nginx runs on port 80
*# Nginx configuration and runing stage.
*FROM nginx:alpine AS runner

# Set working directory to nginx asset directory
WORKDIR /usr/share/nginx/html

# Remove default nginx static assets
RUN rm -rf ./*

# Copy static assets from builder stage
COPY --from=builder /app/build .

# Containers run nginx with global directives and daemon off
ENTRYPOINT ["nginx", "-g", "daemon off;"]
We are choosing nginx:alpine as our runner since it has all packages we need and it is minimal in size.
We are also setting our working directory to /user/share/nginx/html the default location where static assets are served from. Then we are removing all assets found in that directory using this directive RUN rm -rf ./* . Then we will copy our optimized build from the builder stage to the current working directory. Then we are going to run Nginx web server using the command nginx -g daemon off
To build our docker image from this config run
docker build -t reactjs-prod -f ./production/Dockerfile .
We are naming the image reactjs-prod and we are going to use the production Dockerfile in the production directory.
To run the built image in interactive mode we will use the following docker command.
docker run -it -p 80:80 reactjs-prod:latest
The -it flag tells docker to run the container in interactive mode so that we can see the log. The -p flag tells docker to map port 80 of our machine to port 80 of our container. This command will spin up the production docker container running Nginx server.
Where to go from here
If you want more control over how Nginx serves the static assets and how it behaves you can replace the default Nginx config file find in /etc/nginx/nginx.conf with your config file. As an example, you can customize the above runner stage as follows.
*# Nginx configuration and runing stage.
*FROM nginx:alpine AS runner

# Set working directory to nginx asset directory
WORKDIR /usr/share/nginx/html

# Remove default nginx static assets
RUN rm -rf ./*

# Remove the default nginx config file
RUN rm -rf /etc/nginx/nginx.conf

# Copy custom nginx config to the directory
COPY ./nginx/nginx.con /etc/nginx/

# Copy static assets from builder stage
COPY --from=builder /app/build .

# Containers run nginx with global directives and daemon off
ENTRYPOINT ["nginx", "-g", "daemon off;"]
The above config assumes you have a custom Nginx config in nginx directory.
Conclusion
That's it for this one, If you want more explanation on this article leave a comment and I will get back to you.
To get the full code and try it for yourself, It is on GitHub here.
Please comment on any gaps or improvements or just tell me your thoughts down in the comments. Follow me for more in-depth articles like this one.
Use the following link and get 100 USD in DigitalOcean free credit.
